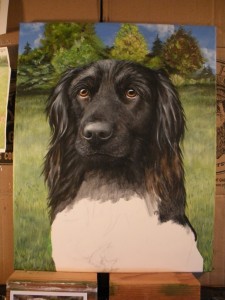
Welcome to the fifth installment of my Pet Portrait Painting, Step by Step: Abbey Blog post! Today we will continue painting Abbey, moving down the length of her snout developing and finishing her nose and mouth. Here is how it will unfold: I will, in sequence, show one or more pictures at a time with a brief explanation of what was happening at that time during the work. To enlarge these pictures just click on them to get the full view, then click them again and they will enlarge! Lets Do It!!!
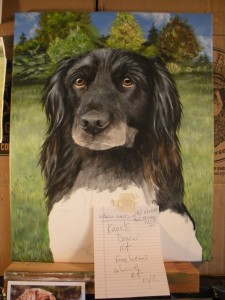
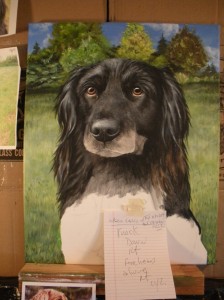
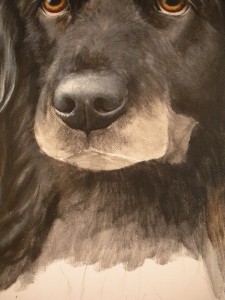
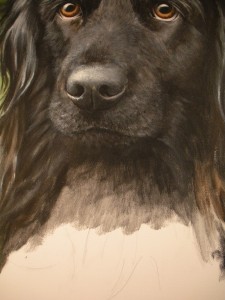
At the end of our last Step by Step: Abbey Blog post I had just finished with her left eye and was starting to work down the snout and into the nose area. We pick it up here with picture #24. I have laid in more detail on the nose. If the eyes are the most important facial feature in a Pet Portrait, the nose is a close second. As the observer, the nose, in most pictures and paintings, will be the closest thing to you,(Except if you are working with a Bulldog or Pug). For this reason it has to look accurate and natural. Dogs noses are moist, the light will reflect, this needs to be shown as well. The nose is not finished yet in this photo but it is getting close. There are still no highlights and I need to make sure the nostril shapes are sized correctly and are even.
Also in picture #24 you will see a piece of paper with some notes on it. Throughout the execution of a Portrait such as this, I will periodically write down things I need to change, work on,or remember. This note is reminding me to rework the ears and the forehead a little. I will usually take care of these changes during my next painting session.
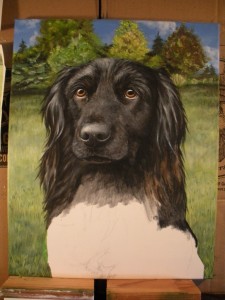
In Picture #27 I have been detailing the mouth region, and have continued as always with my initial base coats of the neck/chest area. Again, always working ahead of myself a little to keep the whole picture flowing evenly and seamless.
All of the work you saw and read about today took me approximately 5 hours to complete. Thank you for reading my Blog here on Pet Portraits By Cy. Check back next week for Blog post #6, the last installment in this “Pet Portrait Painting, Step by Step: Abbey” series. If you know some art lovers or other painters out there who may find this interesting or educational, feel free to share this. Also I will be happy to answer any questions you may have throughout this series of Blog posts, You can Email me from my website, or click the “leave a comment” link here in this Blog post, or you can comment on my Pet Portraits By Cy Facebook fan page: http://www.facebook.com/petportraitsbycy Have a great day everyone! Cy
