Welcome to the Sixth, and last installment of my Pet Portrait Painting, Step by Step: Abbey Blog post! Today we will actually finish the Abbey Pet Portrait! Here is how it will unfold: I will, in sequence, show one or more pictures at a time with a brief explanation of what was happening at that time during the work. To enlarge these pictures just click on them to get the full view, then click them again and they will enlarge! Lets Do It!!!

- Step By Step: Abbey #30

In picture #30 we are starting to develop Abbey’s chest area and any other areas that exist in the foreground. I have, at this point, laid in the first layers of paint. If you look closely I have rotated this picture so it shows the upright position. Actually the canvas is setting on its left side. The reason for this is that I am continuing to paint the chest area under and around the bottom edge of the canvas.

Step By Step: Abbey #31
In picture #31 you can see the development of the bottom edge. As I mentioned at the beginning of this project, I always paint the edges of my paintings. It gives them a finished look and they can be hung as is without a frame.

Step By Step: Abbey #32

Step By Step: Abbey #33
Pictures #32 and #33 show the next two stages of Abbey’s chest development. As you can see I have added color and detail as this area has progressed. It was important for me to get her white spot just right, so a fair amount of time was spent here.

Step By Step: Abbey #34

Step By Step: Abbey #35
In picture # 34 I have finished the chest area and have finally added the whiskers. Aside from the signing of the piece, the whiskers will always be the last thing that I paint. This is because they are forward of everything else and they need to be very clean and sharp looking. If I was not finished with the fur areas of the neck and snout and chest, and painted the whiskers, then I would have to work around them and it would not look clean and convincing. It goes back to our first rule; Paint from the back to the front, painting the areas closest to the viewer last. Picture #35 is a closeup of the finished whiskers.

Step By Step: Abbey #36
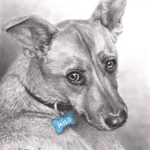
We have reached our last picture! #36 shows the finished piece. I have made touch ups and I have signed it in the bottom right hand corner. What I will do now is just sit with it for a day and watch it. If I see anything that needs attention I will touch it up. Throughout the execution of the Portrait I have been pretty methodical about finishing one area before going to the next, so there usually is not alot of reworking or touching up to do. You still need to watch a finished piece, before you deliver it though, just to be sure.
All of the work you saw and read about today took me approximately 6 hours to complete. The whole Portrait from start to finish took approximately 38 hours to complete. Thank you for reading my Blog here on Pet Portraits By Cy. I hope you have enjoyed this “Pet Portrait Painting, Step by Step: Abbey” series. If you know some art lovers or other painters out there who may find this interesting or educational, feel free to share this. Also I will be happy to answer any questions you may have throughout this series of Blog posts, You can Email me from my website, or click the “leave a comment” link here in this Blog post, or you can comment on my Pet Portraits By Cy Facebook fan page: http://www.facebook.com/petportraitsbycy Have a great day everyone! Cy